Microsoft Outlook Setup (mail1)
Keep Outlook Closed during the initial part of this process.
- Open the Control Panel
- On Windows 7 and older, click on START then Control Panel.
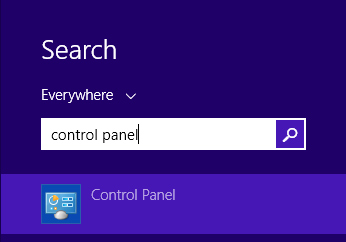
- On Windows 8, open the charms bar by moving the mouse into the upper right corner, then type “control panel” into the search box then click the control panel link (as shown below).
- Or on Windows 10 and 11 use the search box (or magnifying glass) to open the control panel.

- Switch the View by: (in the upper right corner) to Small icons view.
- Find in the list and double click on the Mail icon.
- Click the Email Accounts button.
- Click Add Account
- Click Manually configure server settings or additional server types
- Click Next.
- On the Choose Service page, click Internet E-mail
- Click Next.
- Under User Information:
- In the Your Name box, type your First and Last Name.
- In the E-mail Address box, type your email address.
- Under Server Information:
- Account Type, choose IMAP
- Incoming mail server, type mail1.techlabhq.com
- Outgoing mail server (SMTP), type mail1.techlabhq.com
- Under Logon Information:
- In the User Name box, type your email address.
- In the Password box, type your password.
- If you want Outlook to remember your password, make sure the check box next to Remember password is selected.
- Click More Settings, and then fill in the Internet E-Mail Settings dialog box as follows:
- On the Outgoing Server tab, select My outgoing server (SMTP) requires authentication.
- On the Advanced tab
- Under Incoming server (IMAP), next to Use the following type of encrypted connection, select SSL in the list.
- Set the Incoming server Port to 993.
- Under Outgoing server (SMTP), next to Use the following type of encrypted connection, select SSL in the list.
- Set the Outgoing server Port to 465.
- Click OK.
- Click Next.
- After Outlook tests your account, click Close to close the Test Account Settings dialog box.
- Click Finish.
- On the Account Settings page, click Close.
- A message may appear asking you if you want to download folders for the mail server that you added. Click Yes.
- Use the Outlook user interface to select which folders to synchronize between the server and your local computer (we recommend picking all of them) , and then click OK.
- Open outlook and start emailing with your account!
You can also access your email account online from anywhere, use http://webmail.your-website.com as the link (replace your-website.com with the website name you host with us). For example:
- http://webmail.techlabhq.com
- http://webmail.iotainteractive.com
- http://webmail.yoursite.net
- http://webmail.yourdomain.us
- etc…